• About and Contact
  • Books
  • Headshot Samples
  • PayPal
  • The Model Portfolio Book
  • Videos

~ Headshot, Portrait, and Editorial Photographer

Monthly Archives: May 2016

Headshot Day!

24 Tuesday May 2016

Posted by Bob Harrington in Uncategorized

≈ Leave a comment

Tags

CT Actor Headshot Photographer, CT Headshot Photographer, Headshot, Headshot Day, Interfit S1, Nikon, NYC Headshot Photograpaher, NYC Headshot Photographer, Sony

Hi Everyone,

I’m running a headshot day on June 12, 2016.

I’ve been working with Karen Wagner Talent and IMTA and am offering any model or actor who needs new headshots a chance to get them before the IMTA event.

But this is also open to anyone needing a headshot.

Here are the details:

Location: Courtyard Marriott, 136 Marsh Hill Rd, Orange, CT, directly off of exit 41, I-95, Go to Conference Room A

Date: June 12, 2016

Sitting Details: 

  • 30 minute sittings, starting at 10:00 am
  • Cost: $200.00
  • Deposit of $100.00 to book, balance at your sitting, please add 3.8% for atm/cc card fees
  • You receive all the images from the sitting delivered electronically
  • Two lighting and wardrobe looks
  • One professionally retouched image in hi res and web ready.

Book Now: 203-540-8821 or bob@robertharringtonstudios.com

Screen Shot 2016-05-24 at 11.58.39 AM

Share this:

  • Facebook
  • LinkedIn
  • Twitter

Like this:

Like Loading...

Photoshop Friday on a Monday!

23 Monday May 2016

Posted by Bob Harrington in Uncategorized

≈ Leave a comment

Tags

Adobe Techniques, CT Headshot Photographer, CT Off Camera Flash, Interfit, Nikon, NYC Headshot Photograpaher, Photoshop Techniques, Photoshop Tips, Sony

Hi and welcome back.

Ok, since I didn’t make it last Friday, let’s try for today and again on this coming Friday.

For today, I want to show you how to add a copyright to your images.  And then once you get that, you can create an action to run in the Scripts Manager or just add it per image.  I do it per image on delivered and retouched images as it is fast and simple.

First, pull a web-sized image into PS.  This shot has gone through the scripts manager as a batch conversion and is ready for the internet.

On the left of the PS palette, is the T.  You can choose it here or just type the letter T to place your text:

Screen Shot 2016-05-23 at 9.18.30 AM

Screen Shot 2016-05-23 at 9.18.53 AM

Once you have that chosen, the box along the top will come up and show your choices.

First: choose your script, I like Zapfino

Second: choose your type style, I choose regular but there are other choices

Third: choose type size, this will differ depending on your Font, just test on your image

Fourth: select your justification, although you’ll change this location to taste

Fifth: choose color.  For dark images choose white, for bright images choose blackScreen Shot 2016-05-23 at 9.19.10 AM

Below my text box is on the image and active: Screen Shot 2016-05-23 at 9.19.28 AM

For MAC users, use the Alt/Option key and the letter G to get the Copyright symbol up in the text box.  For you PC users, you’re on your own!  Sorry.  Screen Shot 2016-05-23 at 9.19.49 AM

Then type in your text.  I like the cursive style, so Zapfino works well for me: Screen Shot 2016-05-23 at 9.22.35 AM

Once done, click the text box on the layers palette and your are all set.  Once you’ve gone through the motions, set yourself up with an action and let PS do the work for you.

Screen Shot 2016-05-23 at 9.20.12 AM

Screen Shot 2016-05-23 at 9.20.25 AM

That’s it for now.  Go back a few posts on the page and you’ll find tutorials on how to create an action and batch edit your images to make your photographic life easier.

That’s it for today.  Till next time, happy Photoshopping!

Share this:

  • Facebook
  • LinkedIn
  • Twitter

Like this:

Like Loading...

Saturday in Boston at Theia Studios

19 Thursday May 2016

Posted by Bob Harrington in Uncategorized

≈ Leave a comment

Tags

beauty, Beauty Headshot, CT Actor Headshot Photographer, CT Beauty Headshot Photographer, Dark Beauty, Edgy Beauty, Model, Model Photography, NYC Beauty Headshot Photographer, NYC Headshot Photographer

Hi and welcome back.

Just a quick post today on Saturday’s workshop.

Theia Studios Registration Link

I don’t know how attendance is yet, but I’m planning on doing at least one super creative look.  I’ll show you how to get amazing results with something I bought at Dick’s Sporting Goods.

This is the look.  If you are planning on attending, plan on learning how to create this look with 3 speed lights and some sports tape:

_DSC6420

Hope to see you in Boston!

Till then, happy Spring!

Share this:

  • Facebook
  • LinkedIn
  • Twitter

Like this:

Like Loading...

The Simple Natural Light Headshot

18 Wednesday May 2016

Posted by Bob Harrington in Uncategorized

≈ Leave a comment

Tags

Actor headshots, CT Actor Headshot Photographer, CT Actor Headshots, CT Natural Light Headshot Photographer, Matthews, Matthews Road Rags II, Matthews Silver White Panel, Natural Light Headshots, Nikon, NYC Actor Headshot Photographer, NYC Headshot Photographer, Sony

Hi and welcome back.

I’m going to postpone my Photoshop Friday post that I forgot last week till this Friday. There is simply too much to do right now.

So for today, I’m going to show you how I shoot my natural light headshots.

I pulled these images from the archives as I always forget to take BTS shots, so I found these from a sitting a while back with Gabby.

The day was overcast and windy, so I had nice even light to work with but I always use a reflector for fill under the eyes, nose, and chin.

I’ve been favoring my Matthews Road Rags II reflector for a while as it travels so easily.

Matthews Road Rags II Arm

Matthews Road Rags II Silver/White textile

Here it is broken down and then setup:

_DSC5670 _DSC5684

So as the reflector travels so well and you can use a regular umbrella bracket to mount it, I bring it everywhere:

_DSC5690

So for my client, Gabby, I set up my reflector and went to work.

Here is a shot from the beginning of our session and a few shots of the gear:

_DSC6633 _DSC6635 _DSC6647 _DSC6654

You can see how well the reflector works bouncing a bit of light back up under the eyes, nose, and chin.

In these shots from last Sunday, I sat Jessica down so the late afternoon sun gave her a nice hair light and the Matthews reflector just bounced enough light to open up her face and give me a great flat light:

_RVH1941_web _RVH1944_web

Pay attention to your light and use a simple reflector to get great results in your work.

If you are attending the Saturday’s workshop at Theia Studios in Boston, we’ll be shooting with the Matthews reflector.  Hope to see you there!

Theia Studios Headshot Workshop

That’s it for now.  Till next time, happy reflecting!

Share this:

  • Facebook
  • LinkedIn
  • Twitter

Like this:

Like Loading...

Next Saturday’s Boston Workshop

13 Friday May 2016

Posted by Bob Harrington in Uncategorized

≈ 2 Comments

Tags

Boston OCF Workshops, Boston Photography Workshops, Boston Workshop, headshot workshop, Interfit, Interfit Photographic, Nikon, OCF Workshops, Sony, Speedlight Headshots, Speedlighting, The Headshot

Hi and welcome back.

I’m going to post my PS tip later today for Photoshop Friday.

Next Saturday’s Boston workshop at Theia Studios is on.  I’ll be teaching and you’ll be shooting the Headshot.  So don’t forget your camera and lenses to shoot these awesome and profitable looks.

We’ll explore multiple headshot looks and how to quickly and effectively shoot up to 9 different headshot looks, including:

Corporate, Actor, Model, Beauty, Creative, Glamour, 40’s Hollywood Glamour, and more!

Here is the registration link, don’t miss out on this interactive shooting event where I teach all speed lights to get amazing results:

Theia Studios

Our model for the time is Amanda:

Screen Shot 2016-05-13 at 8.15.23 AM Screen Shot 2016-05-13 at 8.15.41 AM Screen Shot 2016-05-13 at 8.15.57 AM Screen Shot 2016-05-13 at 8.16.23 AM

Hope to see you there!


Share this:

  • Facebook
  • LinkedIn
  • Twitter

Like this:

Like Loading...

Photoshop Friday on a Thursday: Batch Editing

12 Thursday May 2016

Posted by Bob Harrington in Uncategorized

≈ Leave a comment

Tags

Adobe, Adobe Photoshop Lesson, CT Headshot Photographer, Nikon, NYC Headshot Photographer, Photoshop, Photoshop Batch Editor, Photoshop Techniques, Photoshop Tips, PS, Sony

Hi and welcome back.

I told you that I’d get so far behind that I’d catch up!

The last time I gave a tip, I taught you how to create an action.  Today, I’m going to show you how to Batch Edit using that action.

Batch editing is one of those PS tips that will change a lot for you.  No longer will you be editing images one at a time.  PS really shines here as you are free to do other things while PS works for you.

Ok, on to the technique.

Here is a screenshot of a folder of retouched images I got back from my retoucher.  On the right, you can see the size of the TIFF’s she sent me.  I send all RAW images out and get TIFF’s back so I can final edit and then send them out to my client.

Screen Shot 2016-05-06 at 8.04.34 AM

Now, go into PS and choose File>Scripts>Image Processor.

Here is where the batch editor lives.

Screen Shot 2016-05-06 at 8.05.57 AM

Here is the box that comes up.  I’ll go through each segment of it here:

  1. Select your folder from your computer; this is fairly self-explanatory
  2. Select your destination folder; I keep them in the original folder but you can move them to another folder if you want
  3. Select File Type for your final output; here you can choose to convert your images to Jpegs, Psd, or Tiff.  Your choice here depends on your final destination for the image.  I normally stick with Jpegs.
  4. Select your action to be run.  Here, I chose the action that I taught last time: Web Sharpen.

Screen Shot 2016-05-06 at 8.06.54 AM

Let’s take a look at my choices:

  1. I chose my folder: Greta Jones Retouch
  2. I save the edits in the same location
  3. I chose to convert my Tiffs to web jpegs, so I checked the Resize to Fit to 800px x 800px.  PS will automatically size the long side of the image and resize the short side, so your images will look like: 800 x 532 or something like that.
  4. Here, I chose to Run Action, Default actions as this is where my action is stored, and I chose Web Sharpen.  So as PS resizes my images it automatically sharpens them for output to the web.

Note: If you want to convert Tiffs to Hi Res jpegs, simple uncheck the Resize to Fit box and your Tiffs will become Hi Res jpegs instead.  Then choose Hi Res Sharpen from box 4 and your images are all set for print output.

Note: If you have other actions you want to run, like something from Kubota Tools, simply choose that action and your images will get converted using that action.

I’ve converted full folders to B/W using Totally Rad Actions Bitchen B/W or Kubota B/W Mid-Brite.

Here is the folder I chose:

Screen Shot 2016-05-06 at 8.07.05 AM

Once you are all set, click run: Screen Shot 2016-05-06 at 8.07.27 AM

Here is my folder now, with my newly-created folder of web jpegs.  If you look on the right, you’ll see my Tiffs still there.Screen Shot 2016-05-06 at 8.08.49 AM

Here is the new folder with my web ready jpegs, see the size of the images, they are not 72 mb but 4-500 kb sized for the web.  Screen Shot 2016-05-06 at 8.09.07 AM

I normally go back and then retitle the folder Web Jpegs.  Then I run the Scripts Manager again and change my Tiffs to Hi Res jpegs for print.

That is the Scripts Manager!  Let PS do the work for you while you get a coffee, go for a walk, or get lunch.  You can batch edit folder of hundreds of images all at once while you go and do something else.

I love batch editing and it works perfectly for converting images from Tiffs or Hi Res to Web images.

For tomorrow, creating an action for a Copyright tag on your images.

Till then, happy Batch Editing!

Share this:

  • Facebook
  • LinkedIn
  • Twitter

Like this:

Like Loading...

Boston Headshot Workshop, May 21 at Theia Studios

05 Thursday May 2016

Posted by Bob Harrington in Uncategorized

≈ Leave a comment

Tags

Boston OCF, Boston Off Camera Flash, Boston Photography Workshops, Boston Workshops, CT Beauty Headshot Photographer, CT Headshot, CT Headshot Photographer, North Andover, OCF Workshop

Hi and welcome back.

I’m heading back to Boston for the first time in about 3 years.  The last time I taught there I was with E.P. Levine, which sadly went out of business in late 2015.

But I’ve been invited to teach my Headshot Workshop at this new studio:

Theia-Studios in North Andover, MA

Registration link: Theia Studios

Date: May 21, 2016

Time: 11-4

Cost: $159.00

This is the same workshop that I just ran in NJ last Saturday.  This is a very popular workshop where I teach multiple headshot looks using a few speed lights and simple, commercially available modifiers, including:

Shoot Through Umbrella

Rogue Flashbenders

Bowens 20×30 softbox

Phottix Collapsible Beauty Dish

Bring your camera as you’ll get to shoot these looks with a professional model:

Corporate

Actor

Model

Creative Light

Beauty

Dark Beauty

Gelled light

Don’t miss out on this great, fun, and interactive event.

Bring your camera and lens kit; I supply all the gear and radio triggers for you to shoot with.

Till then, happy lighting!

Screen Shot 2016-05-05 at 3.50.06 PM


Share this:

  • Facebook
  • LinkedIn
  • Twitter

Like this:

Like Loading...

The Interfit S1 Monolight Review

04 Wednesday May 2016

Posted by Bob Harrington in Uncategorized

≈ 2 Comments

Tags

Bowens S-Mount, Canon, Interfit Ambassador, Interfit S1 Moonlight Review, Interfit S1 Review, Interfit S1 Unbox, Intertit S1, Monolight Review, Nikon, S1 Review, Sony

Hi and welcome back.

Interfit sent me a new S1 monolight to test and use.  Actually, in full disclosure, I’m a new Interfit Ambassador.

But this review will be as unbiased and honest as possible.  I’m very hard on my gear and expect it to work, so I’m giving you a simple review of the newest light in the Interfit lineup that I can.

First, if you like the review and want to purchase any Interfit S1 or any Interfit gear, my 10% off coupon code on the Interfit web page is: HARRINGTON10

In this image, you see from left to right:

Top row: battery, monolight, travel cap, 7″ reflector

Bottom row: battery charger, air remote, mains power adapter (Air Remote purchase separately)

It is utterly amazing that for $999.00 retail, plus my 10% off, you get a 500 ws monolight with battery and mains power ability.

_DSC6233

Let’s take a look at the light.  It has excellent fit and finish.  It comes with a battery and a mains adapter.  This is unheard of in professional gear.

Here are the sides, back, and angled view to see how simple the unit is and is easy to learn.  I learned it in less than 5 minutes from unbox to operation without directions.

The frosted glass dome houses a flash tube and LED modeling light.

_DSC6241 _DSC6239

_DSC6238

_DSC6245

_DSC6249

This is an easy light to learn and use right out of the box.

Here is the port for a third party trigger like a Pocket Wizard or something else.  This is awesome as you can plug in a PW, use a light meter with the PW module for wireless metering, and still use the Air Remote in your hand or on the camera to adjust power up or down.  They don’t interfere with one another.

_DSC6250

Here is the mounting setup.  I was a bit confused in the beginning as usually the mounting screw and tilting bracket are on the same side and fight one another, or you get your hands caught in one or the other while adjusting the light.

But this is brilliant: the engineers swapped sides, so each has its own side.  Now, one does not fight the other.  Brilliant!

_DSC6247 _DSC6246

This is mainly sold and marketed as a battery powered light that does High Speed Sync.  The battery is excellent and is rated at 350 full power flashes, rivaling the Profoto B1.  If you are looking for a B1 but don’t want to spend for it, this is your alternative.

Here is the light with the battery in DC mode.  Simply turn the unit on to the DC side of the switch and the battery runs the unit.

_DSC6252

But, as this light just gets better and better, remove the battery and plug in the mains adapter and you can shoot without the battery even in the unit!  This is awesome!  You  can shoot in the studio with mains power while the battery charges for when you leave the studio.

_DSC6248

_DSC6254

_DSC6255

This is amazing.  The unit just keeps on giving and giving.

Last but not least is the Air Remote.  While it does not come with the unit, you can purchase it for only $99.99.  You can control multiple groups with the remote and engage HSS for Canon and Nikon with Sony on the way for Summer.

_DSC6258 _DSC6259

The entire system is so east to use that anyone can do it.  It took me 5 minutes from unbox to shoot ready with mains power.  I had to charge the battery and then I was ready to shoot on location.

As of right now, I’ve not shot in the real world with it.  I have sittings booked that I’ll be shooting and testing the light at the same time.

The specs are excellent on the unit and it can be purchased through Interfit to take advantage of my 10% coupon code: HARRINGTON10

Interfit

So here are the pros and cons as I see it after only a brief time with the light.

Pros: 

  • Excellent fit and finish
  • Air Remote
  • Great weight distribution from front to back, you can use this light on a lightweight stand with a small modifier like a 24 x36 softbox or beauty dish
  • Great amount of power at 500 ws
  • Bowens S mount
  • Battery and Mains adapter included
  • Great mounting design
  • Recycle time is excellent.  The Profoto B1 is only slightly better when used with a battery
  • Consistency of light output and color across the entire f/stop range

Cons: 

  • Modeling light is weak and if you are looking for strong light to actually see where the light will fall as with a typical modeling light, you won’t see it here.  But that is not a deal-breaker
  • The cover for the mains adapter on the light needs to be stronger, I can see it breaking off easily under hard use
  • The mounting lock nut threads are very loose.  This is a manufacturing issue that needs to be addressed as the lock nut has a great deal of play and does not feel like it will last a long time.  This is easily fixed at the factory and needs to be done.
  • Power: the B1 goes a bit lower on power, like 1.0 as compared to 2.0 on the S1.  To shoot at wide apertures, just carry Neutral Density Filters for the light with you, but this is a total nitpick for anyone bringing it up in conversation.  Once a modifier is on the light, you are all set for 2.0 shooting: i tried it already

If you are upgrading or getting a new kit, take a hard look at these lights.  They are beautiful and just plain awesome.

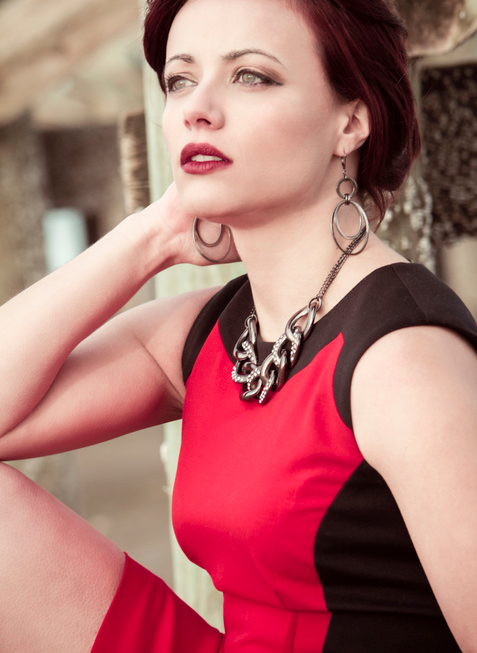
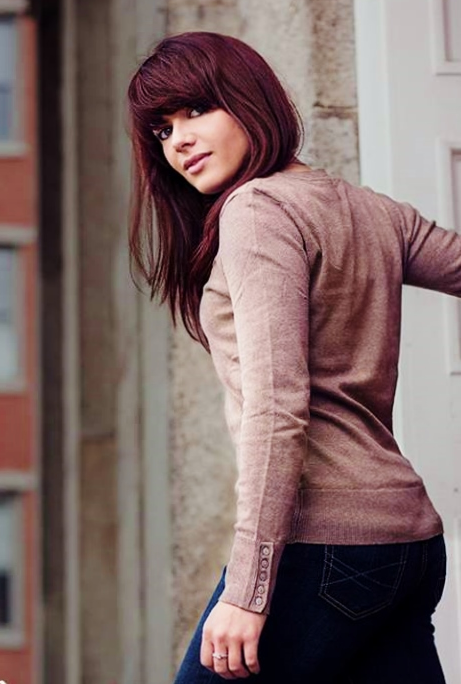
I’ll be posting images and more reviews soon as I rotate this light into my workflow.

That’s it for now.  Till next time, happy lighting!


Share this:

  • Facebook
  • LinkedIn
  • Twitter

Like this:

Like Loading...

Photoshop Friday on a Tuesday!

03 Tuesday May 2016

Posted by Bob Harrington in Uncategorized

≈ Leave a comment

Tags

Adobe, Adobe Photoshop Lesson, Nikon, Photoshop, Photoshop Lesson, Photoshop Tips, Photoshop Tutorial, PS, Sharpening technique, Sony, Web Sharpen

Hi and welcome back.

Welcome to Photoshop Friday on a Tuesday.  I get behind often, so watch out, someday I’ll get so far behind that Photoshop Friday will actually happen on a Friday, just stay tuned.

Ok, for today, I’m going to show you how to create your own action.

Here is a screenshot of the image I want to sharpen for the Internet.  I gave you my web settings a few posts ago, but I’ll give you them again during the tutorial.

Screen Shot 2016-05-03 at 8.30.33 AM

The first thin you have to do is get your action palette out of button mode.  Click on the far right downward triangle to get into button mode and then uncheck the mode:

Screen Shot 2016-05-03 at 8.30.36 AM

Screen Shot 2016-05-03 at 8.30.49 AM

Once unchecked, your palette will look like this.  Then, on the bottom of the palette, there is a small icon that looks like a sticky note pad with the lower left corner dogeared.

Click this button and this will start the action creating process:

Screen Shot 2016-05-03 at 8.31.02 AM

Once the action creation process is started, a box will come up that asks a few question.

Here, I keep things simple:

Title: Web Sharpen

Location: Default Actions, this will put the action in the top portion of the list

Function Key Command: I don’t use this but you can

Color: I color code all the actions I create, here I chose blue

Screen Shot 2016-05-03 at 8.32.06 AM

Once you fill in all the blanks, click record and your action will start to record.  You will see the red button on the bottom turn on.  Now, use Ctrl-J to duplicate your background layer:

Screen Shot 2016-05-03 at 8.32.37 AM

Now go to the top of the page and select Filter>Sharpen>Unsharp Mask and put in your web sharpening numbers:

Screen Shot 2016-05-03 at 8.33.03 AM

Screen Shot 2016-05-03 at 8.35.35 AM

Once this is complete, you will turn off the action by clicking the green square on the left of the action palette.  You can see the action Unsharp Mask that you created in the action palette.  Note, the left arrow points to the stop action box, it is not green here but it will be green when you click it:

Screen Shot 2016-05-03 at 8.36.15 AM

Then we return to the top right corner and that little downward arrow to bring the action palette back to Button Mode and voila, your blue colored action for web sharpening is there in full view ready to use:

Screen Shot 2016-05-03 at 8.36.43 AM

That’s out tutorial for today.  On Friday, I’ll show you how to batch process and convert a folder of images into web images pressed and sharpened and ready for output for a client or web use.

That’s it for today.  Till Friday, happy Photohsopping!

Share this:

  • Facebook
  • LinkedIn
  • Twitter

Like this:

Like Loading...

Proofs from Saturday’s Workshop at Unique Photo, NJ

02 Monday May 2016

Posted by Bob Harrington in Uncategorized

≈ Leave a comment

Tags

40's Hollywood Glamour, Actor headshot, Bowens Softbox, Corporate Headshot, CT Headshot Photographer, Headshot, Headshot Photographer, Model Headshot, Nikon, NJ, NYC, NYC Headshot Photographer, Phottix, Sony

Hi and welcome back.

For today, I’m uploading a bunch of proof images from my Headshot Workshop at Unique Photo last Saturday.

I’ll post Photoshop Friday, which I missed last week, later today or tomorrow.  I won’t forget!

All the images below were shot with speed lights and are right out of my camera, raw to jpeg conversions.

If you like what you see, join me in Boston on May 21 at Theia Studios for another Headshot Workshop, where I teach corporate, actor, model, and creative light for the headshot.

Here is the link: Theia Studio Headshot Workshop

Proofs all done with location lighting techniques:

_DSC6044 _DSC6052 _DSC6083 _DSC6105 _DSC6114 _DSC6138 _DSC6141 _DSC6142 _DSC6169 _DSC6198

That’s it for now.  Till next time, happy shooting!

Share this:

  • Facebook
  • LinkedIn
  • Twitter

Like this:

Like Loading...

Enter your email address to subscribe to this blog and receive notifications of new posts by email.

Join 1,675 other followers

Blogroll

  • Adorama
  • BH Photo Event Space
  • Calumet Photographic
  • Colorworks NYC
  • EP Levine
  • Expoimaging
  • Hunt's Photo and Video
  • Mac Group
  • Mastering Photo
  • Photo Connection
  • Pocket Wizard
  • Rock the Shot
  • Unique Photo

Recent Posts

  • Gear for Sale
  • BH Photo Event Space Next Week
  • Upcoming Workshops
  • The Model Polaroid Sitting
  • Milford Adult Ed and This Weekend’s Boston Workshops with Theia Studios

Archives

  • June 2018
  • December 2016
  • October 2016
  • September 2016
  • August 2016
  • July 2016
  • June 2016
  • May 2016
  • April 2016
  • March 2016
  • February 2016
  • January 2016
  • December 2015
  • November 2015
  • October 2015
  • August 2015
  • May 2015
  • April 2015
  • March 2015
  • February 2015
  • January 2015
  • December 2014
  • November 2014
  • October 2014
  • September 2014
  • August 2014
  • July 2014
  • June 2014
  • May 2014
  • April 2014
  • March 2014
  • February 2014
  • January 2014
  • December 2013
  • November 2013
  • October 2013
  • September 2013
  • August 2013
  • July 2013
  • June 2013
  • May 2013
  • April 2013
  • March 2013
  • February 2013
  • January 2013
  • December 2012
  • November 2012
  • October 2012
  • September 2012
  • August 2012
  • July 2012
  • June 2012
  • May 2012
  • April 2012
  • March 2012
  • February 2012
  • January 2012
  • December 2011
  • November 2011
  • October 2011
  • September 2011
  • April 2011
  • March 2011
  • February 2011
  • January 2011
  • December 2010
  • November 2010
  • October 2010
  • September 2010
  • August 2010
  • July 2010
  • June 2010
  • March 2010
  • February 2010
  • January 2010
  • December 2009
  • November 2009

Categories

  • Uncategorized

Blog at WordPress.com.

Cancel
%d bloggers like this: